
Creating a Canvas Profile
Your Canvas profile allows you to manage information that may be visible to instructors and classmates, including your profile picture, biography, pronouns, and personal links. Your preferred first name (if designated through Wilmington University) and legal last name are automatically loaded into Canvas from the Student Information System.
As a member of the Wilmington University community, you are expected to maintain professionalism in your Canvas profile and activities.
Privacy Reminder: Your Canvas profile is visible to instructors and classmates enrolled in your courses. To protect your privacy, do not post personal information such as phone numbers, personal email addresses, or home addresses.
Manage Your Canvas Profile:
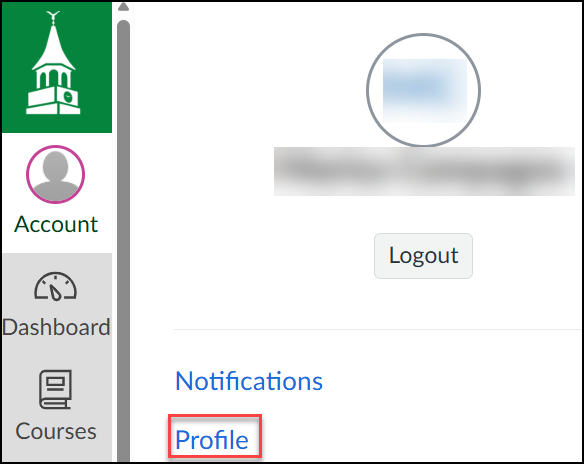
- In Global Navigation, click the Account link.
- Click the Profile link.
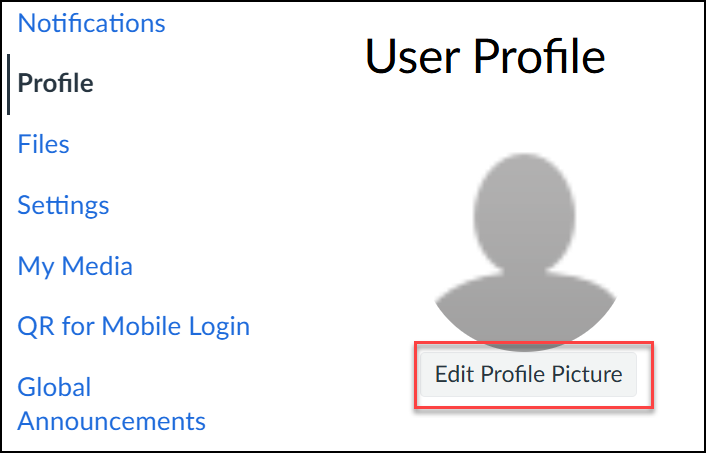
- To upload a profile picture, click Edit Profile Picture, then click the choose a picture link. You can also drag a picture from your desktop and drop it into the uploader. Learn more about the three ways to add a profile picture.
Tips for profile pictures:- Please choose an appropriate picture to represent yourself. Wilmington University has the right to remove pictures that are not appropriate for a classroom setting. Follow the Dress for Virtual Meetings or Sessions guidelines described on the Remote Learning and Virtual Meeting Requirements page.
- Images should be square in size to prevent your picture from being resized or distorted.
- Files can be any type (.jpg, .png, .gif) or size as long as you have room in your personal files to store the file. Canvas recommends that your profile picture be as small as possible.
- Your personal files quota is enforced when uploading a profile picture. If you do not have enough storage space in your personal files, you will not be able to upload your profile picture. Create more space by removing some files in your personal files.
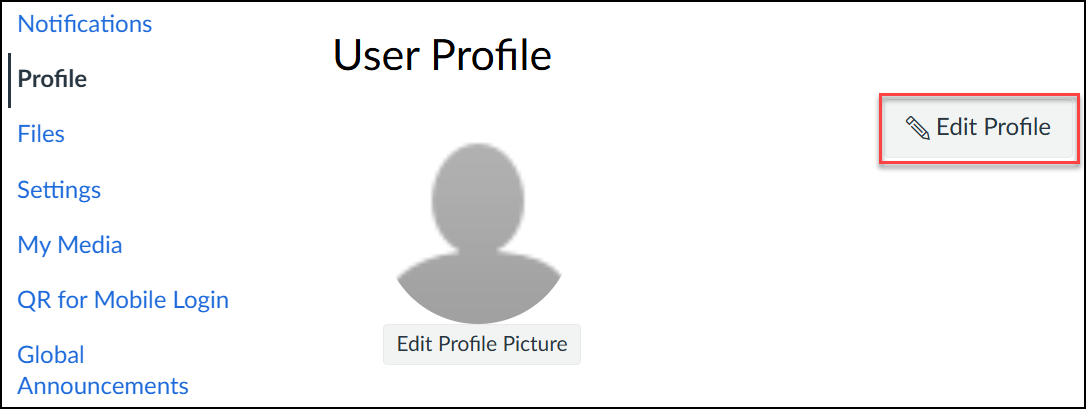
- To edit other aspects of your Canvas profile, click Edit Profile.
- Preferred first names cannot be updated directly in Canvas. Visit the Student Preferred First Name page for instructions.
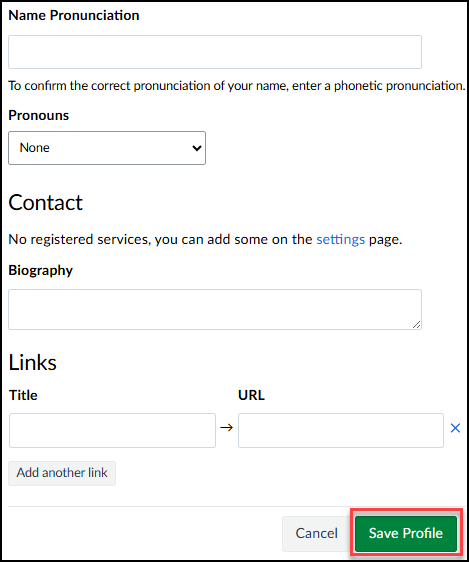
- Enter a phonetic pronunciation to help others pronounce your name correctly.
- You can select one of the following pronoun options: None, She/Her, He/Him, or They/Them.
- Use the Biography field to introduce yourself to instructors and classmates. You may wish to include your academic interests, career goals, professional experience, hobbies, student club or association memberships, or other information you would like to share.
- To add personal links to your profile, such as personal websites, blogs, or portfolios, enter the title of the link in the title field. Then copy and paste the URL in the URL field. Only add links that are appropriate and you are comfortable sharing with instructors and classmates.
- Click the Save Profile button. Your updated profile information will be saved immediately and visible to instructors and classmates enrolled in your courses.
Profile Best Practices
- Use a clear, professional photo.
- Add a short biography to introduce yourself.
- Review your profile periodically to keep information current.
- Avoid posting personal contact information.